


Slow Network & Airplane Mode on the iOS Simulator
Throttle the iOS Simulator to 3G or Edge, turn off its network completely, or enable airplane mode, all without a proxy and while your Mac stays online.
It’s essential to test your app in bad networking conditions during app development. Historically, you’ve had to test this on an actual device using Airplane mode or turn off your Mac’s WiFi. Both are not ideal and often slow you down during development.
How to use
Section titled “How to use”Open the side window and select the Networking tab with the antenna icon. Use Network Speed Control to choose a profile — for example 3G, Edge, 100% packet loss, or Simulator Airplane Mode — then enable it for your Simulator app. Your Mac stays online; only the Simulator’s network is affected.
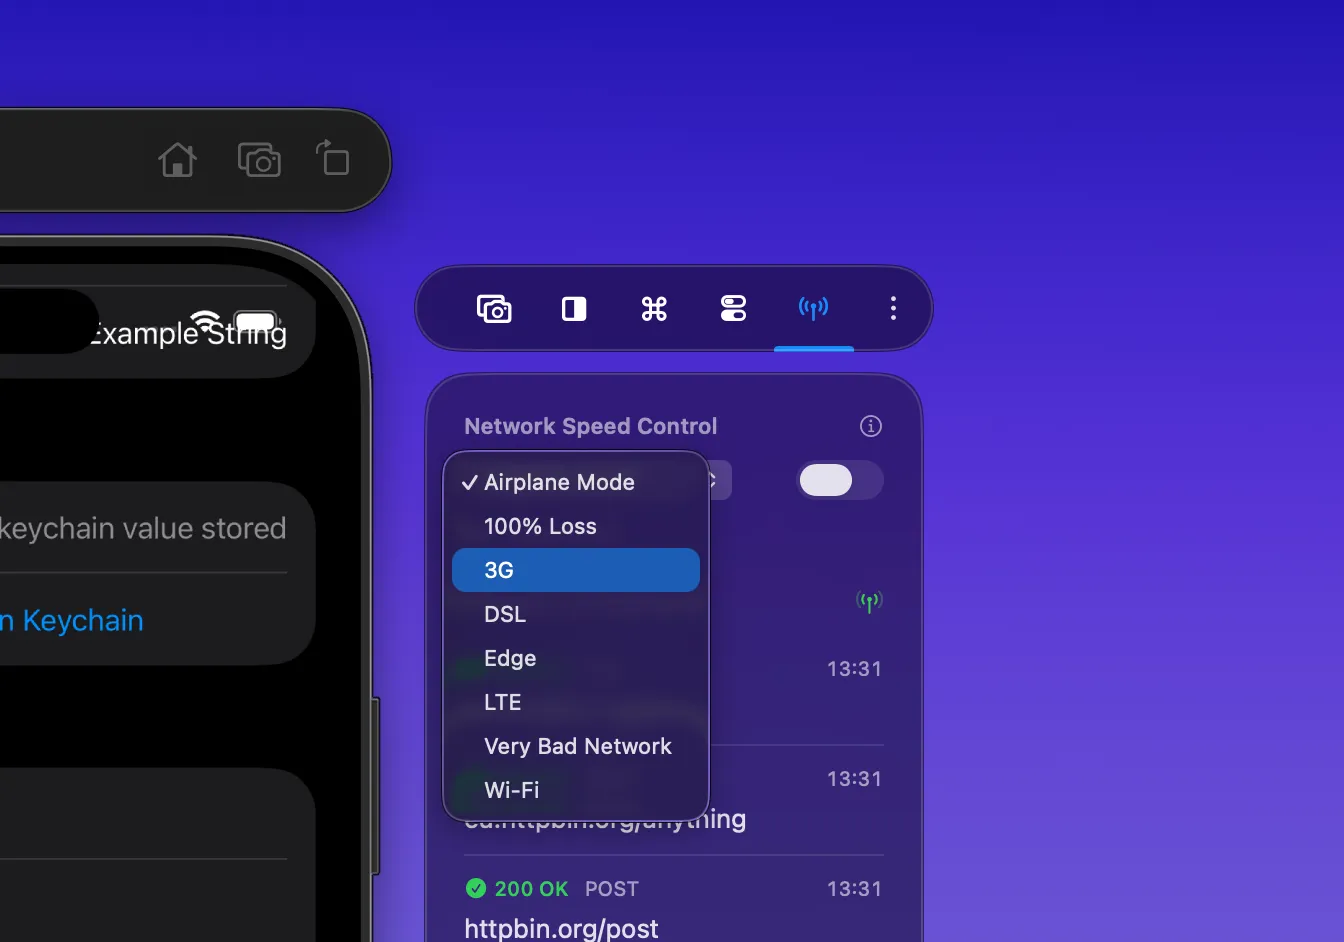
To see this in action, you can watch our Network Monitoring demo on YouTube:
RocketSim’s Network Speed Control allows you to test your app for poor connections within the Simulator. The best thing of all: your Mac’s internet connection stays working, so you can still access ChatGPT or Stack Overflow while developing your app.
I encourage you to read my article Optimizing your app for Network Reachability to prepare your app for bad networking conditions using RocketSim. For inspecting requests while testing, see Network Traffic Monitoring. Network Speed Control is part of RocketSim’s networking tools for the iOS Simulator.
Turn off the network for the Simulator only
Section titled “Turn off the network for the Simulator only”You don’t have to turn off your Mac’s WiFi to test your app offline. Select Simulator Airplane Mode to block all connections for your app, or use 100% packet loss to simulate a connection that looks alive but never delivers data. Both profiles only affect the Simulator app you configured, so your Mac stays online.
This is the quickest way to test offline mode, empty states, and error handling. You switch profiles from the side window while your app keeps running, so you can immediately see how your app responds.
Control network conditions from the CLI
Section titled “Control network conditions from the CLI”RocketSim 16.3 lets scripts and AI coding agents enable the same profiles through the version-matched rocketsim CLI:
rocketsim network set 3grocketsim network statusrocketsim network offAvailable profiles are airplane, 100-loss, 3g, edge, lte, wifi, dsl, and very-bad.
By default, network set targets the apps in RocketSim’s Recent Builds list. Pass one or more bundle identifiers when you need explicit targets:
rocketsim network set 100-loss \ --bundle-id com.example.store \ --bundle-id com.example.store.widgetsCLI network control requires RocketSim Pro and the same enabled Network Extension as the side-window control. See RocketSim CLI for the full agent workflow.
RocketSim 16.4.2 prevents network commands from waiting indefinitely when the extension is unavailable. A network_extension_not_ready response includes a reason:
needs_user_approval: open RocketSim’s Networking window and approve the Network Extension. macOS requires this user action.timed_out: the bounded backend operation did not finish. Retry once before checking the extension in System Settings.
Always run rocketsim network off when the test is complete.
How does this feature differ from the Network Link Conditioner?
Section titled “How does this feature differ from the Network Link Conditioner?”Apple’s Network Link Conditioner works great, but also affects your Mac’s connectivity. RocketSim only impacts your Simulator’s application so you can still enjoy a lightning fast internet connection while optimizing your app for slow networking conditions.
Can I see the network profile that is applied for each configuration?
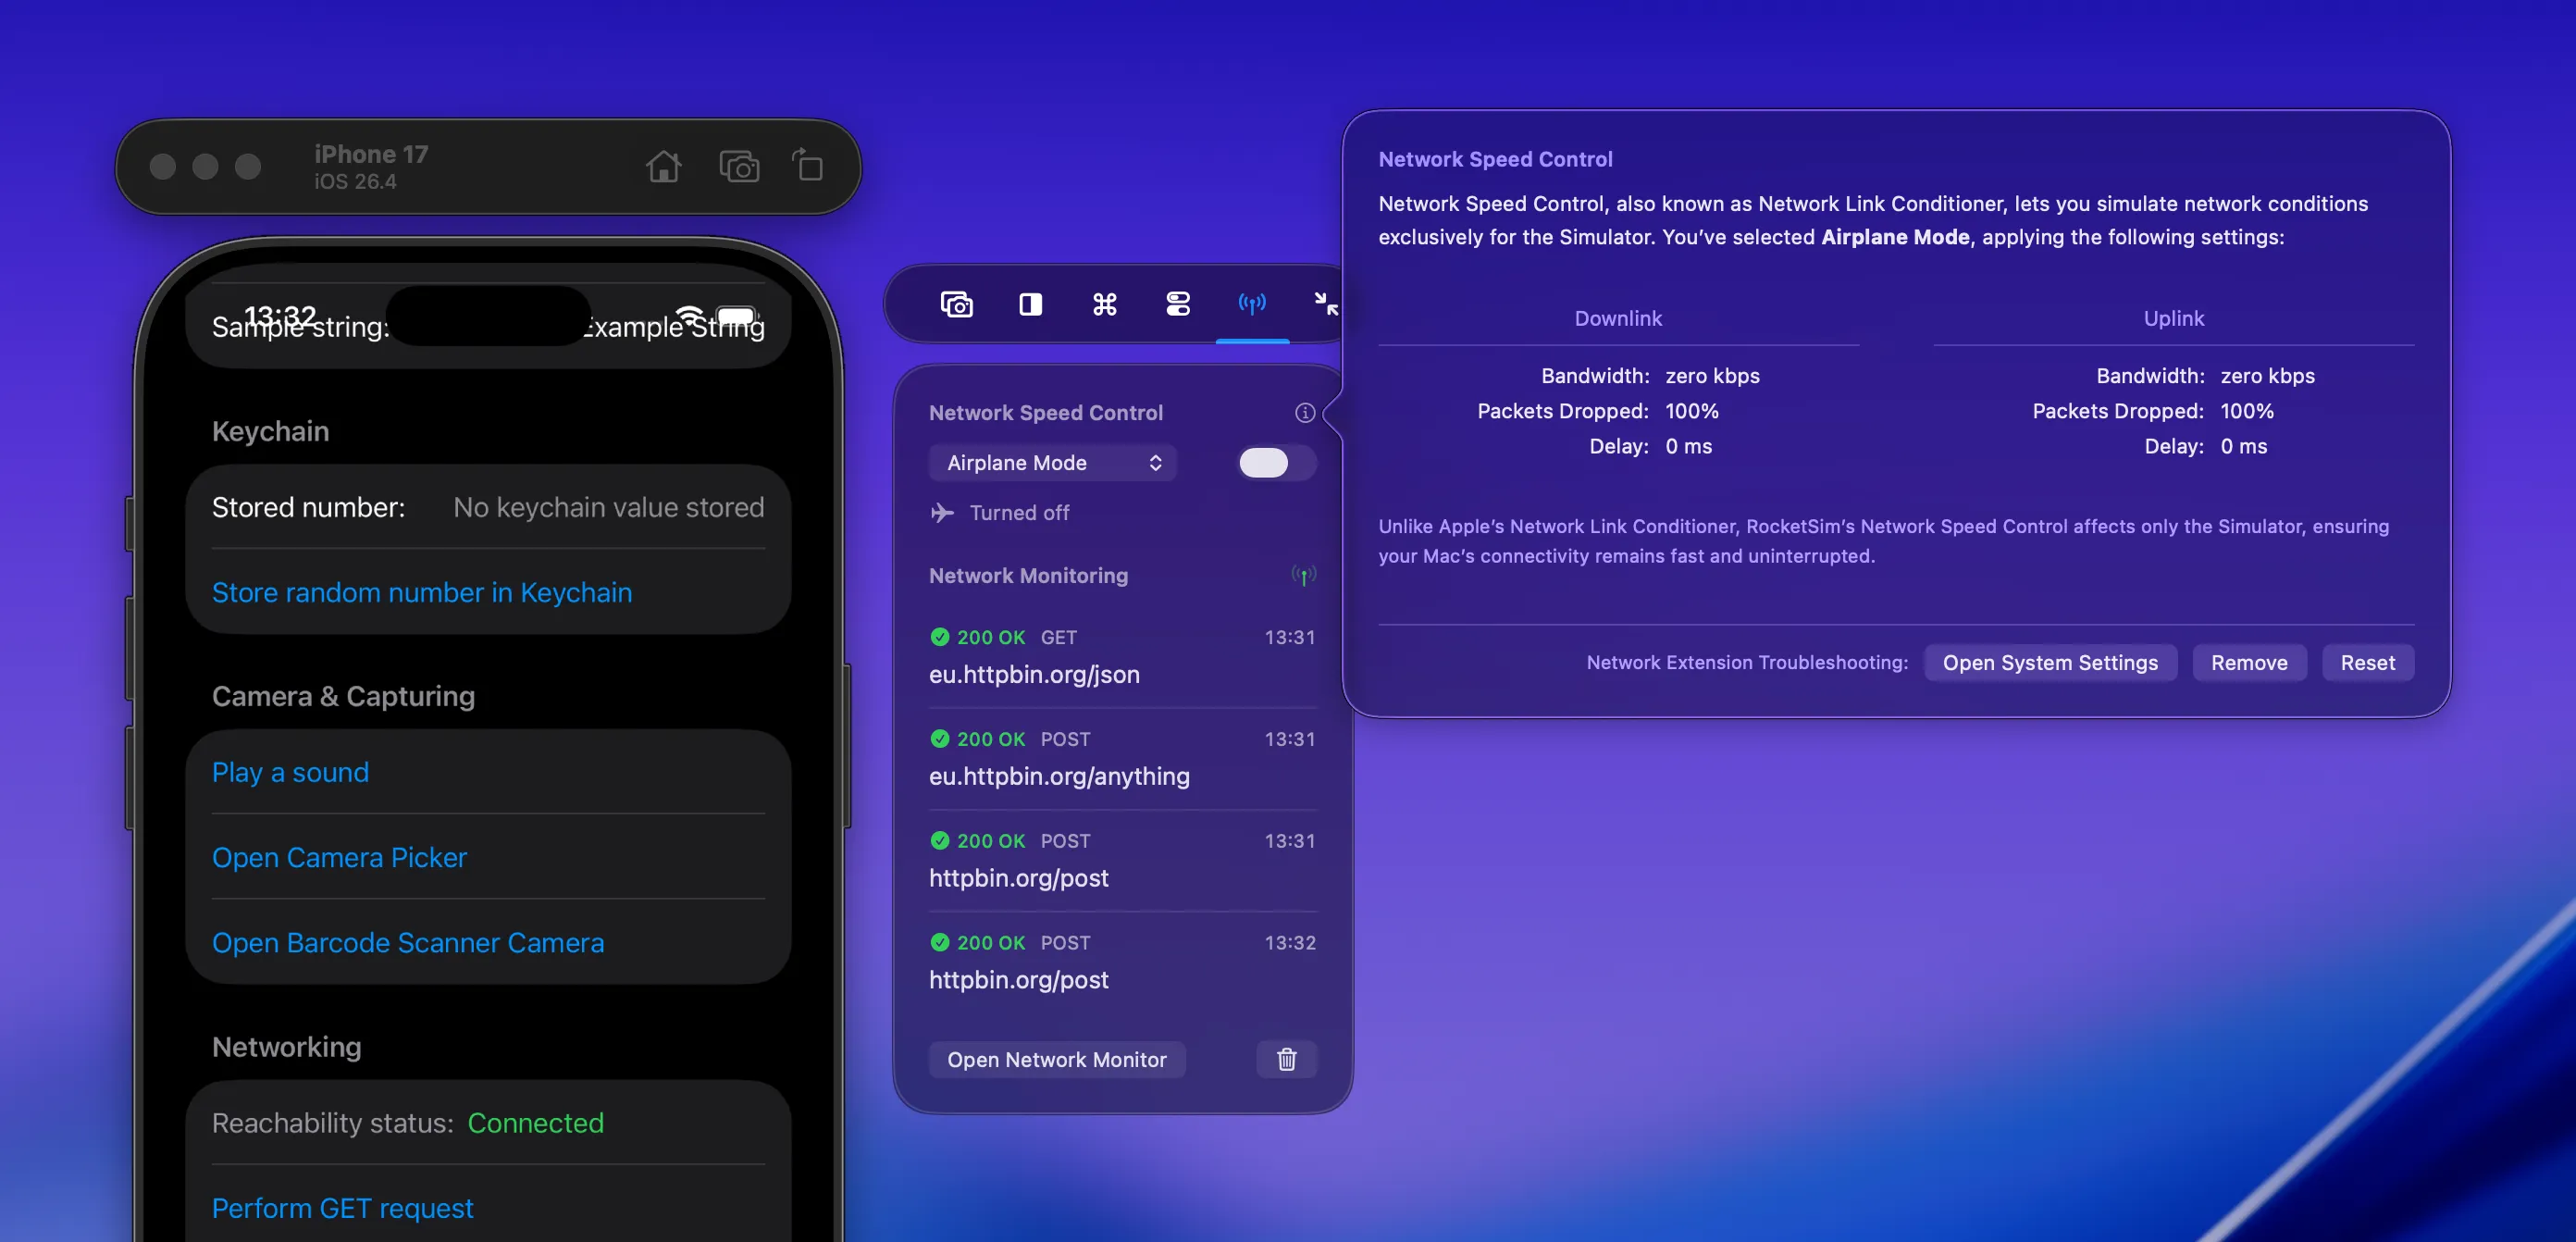
Section titled “Can I see the network profile that is applied for each configuration?”Yes, you can! Just click the little info button next to the Network Speed Control button:
How do I enable Network Speed Control on macOS Sequoia?
Section titled “How do I enable Network Speed Control on macOS Sequoia?”The system settings are a bit more hidden, but you can find them here: System Settings → General → Login Items & Extensions → Network Extensions.
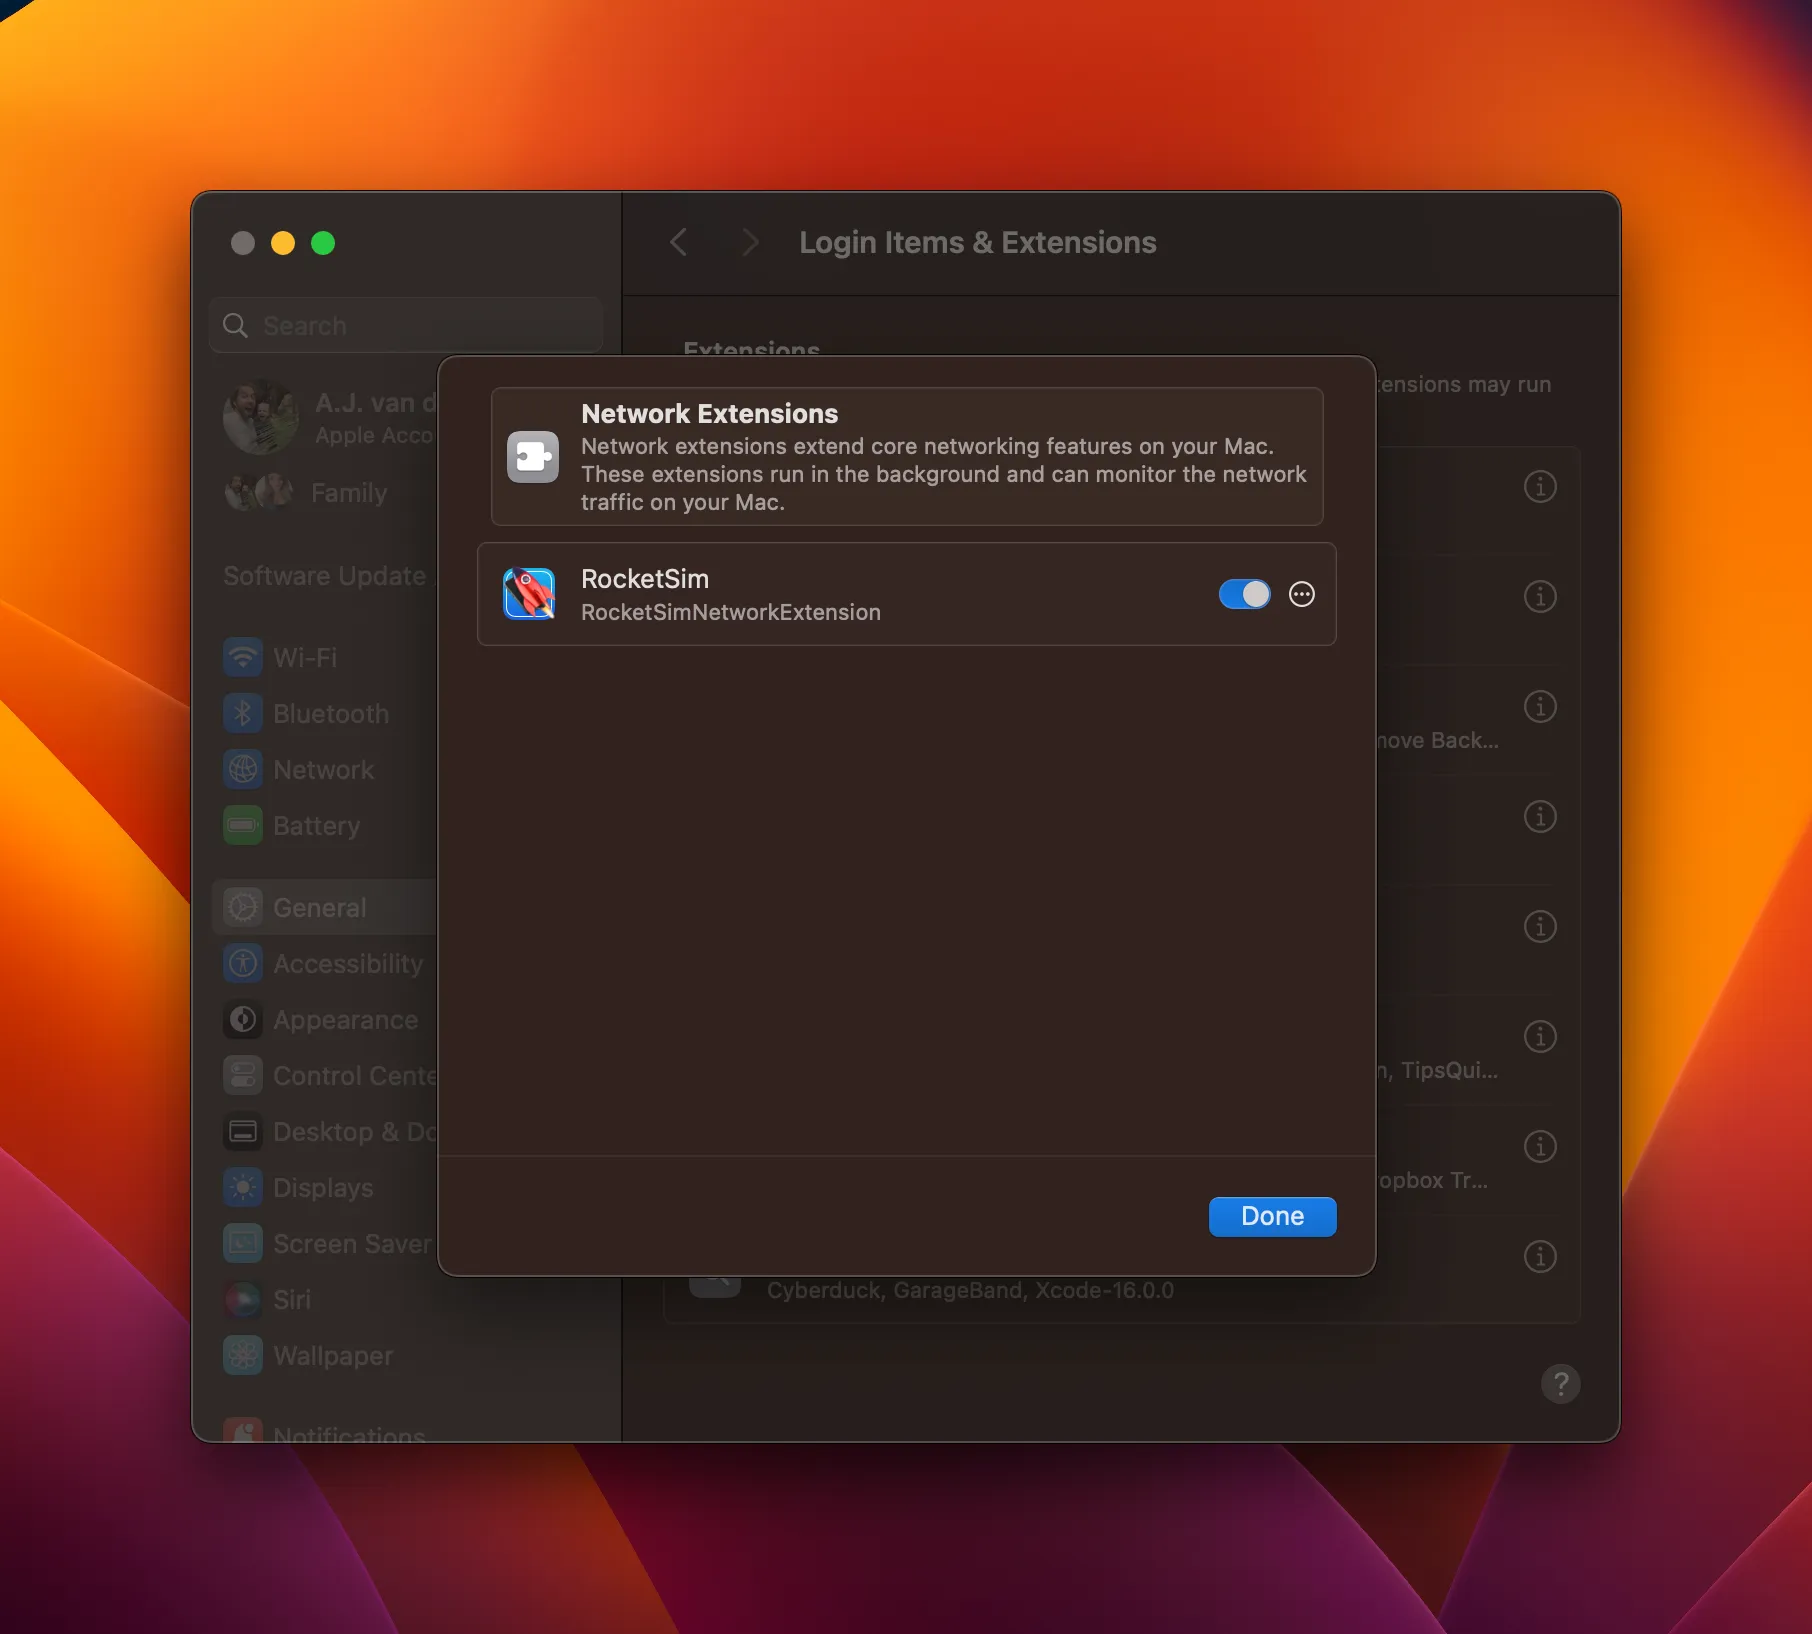
Make sure to switch the permissions switch to on and you should be able to get started with Simulator Airplane Mode.
I turned on the Network Speed Control Airplane Mode, but networking still works?
Section titled “I turned on the Network Speed Control Airplane Mode, but networking still works?”RocketSim only blocks connections coming from your configured bundle identifier. We’re also optimized for URLSession-based applications. In case you’re still running into issues, we recommend getting in touch via support@rocketsim.app.
Also, make sure to update to 13.0.0 or up since we improved quite a bit!
What if Network Speed Control isn’t working?
Section titled “What if Network Speed Control isn’t working?”This is usually caused by missing system permissions.
-
Quit Xcode, all Simulators, and RocketSim, then reopen them.
(This often fixes the issue after Xcode or macOS updates.)
-
Open System Settings → Privacy & Security and approve any pending RocketSim permissions.
-
Open System Settings → Network → Filter and verify whether RocketSim is present & enabled
-
On macOS Sequoia (15) and later, enable the Network Extension:
- System Settings → General → Login Items & Extensions
- Find RocketSim, click (i), and enable Network Extension You may need to approve permissions more than once.
-
Still not working? Do a clean reinstall:
- Delete RocketSim.app from Applications
- Empty the Trash and reinstall RocketSim
-
If it still doesn’t work, run
systemextensionsctl listand email the output to support@rocketsim.app