


RocketSim Agent Skill
Install RocketSim's bundled Agent Skill so Cursor, Claude, Codex, Xcode, and other AI coding tools can navigate the iOS Simulator safely.
The RocketSim Agent Skill is the recommended way to connect AI coding tools to RocketSim. It teaches your agent how to use the version-matched rocketsim CLI, when to read visible elements, when to interact, how to recover after screen changes, and when to use a screenshot fallback.
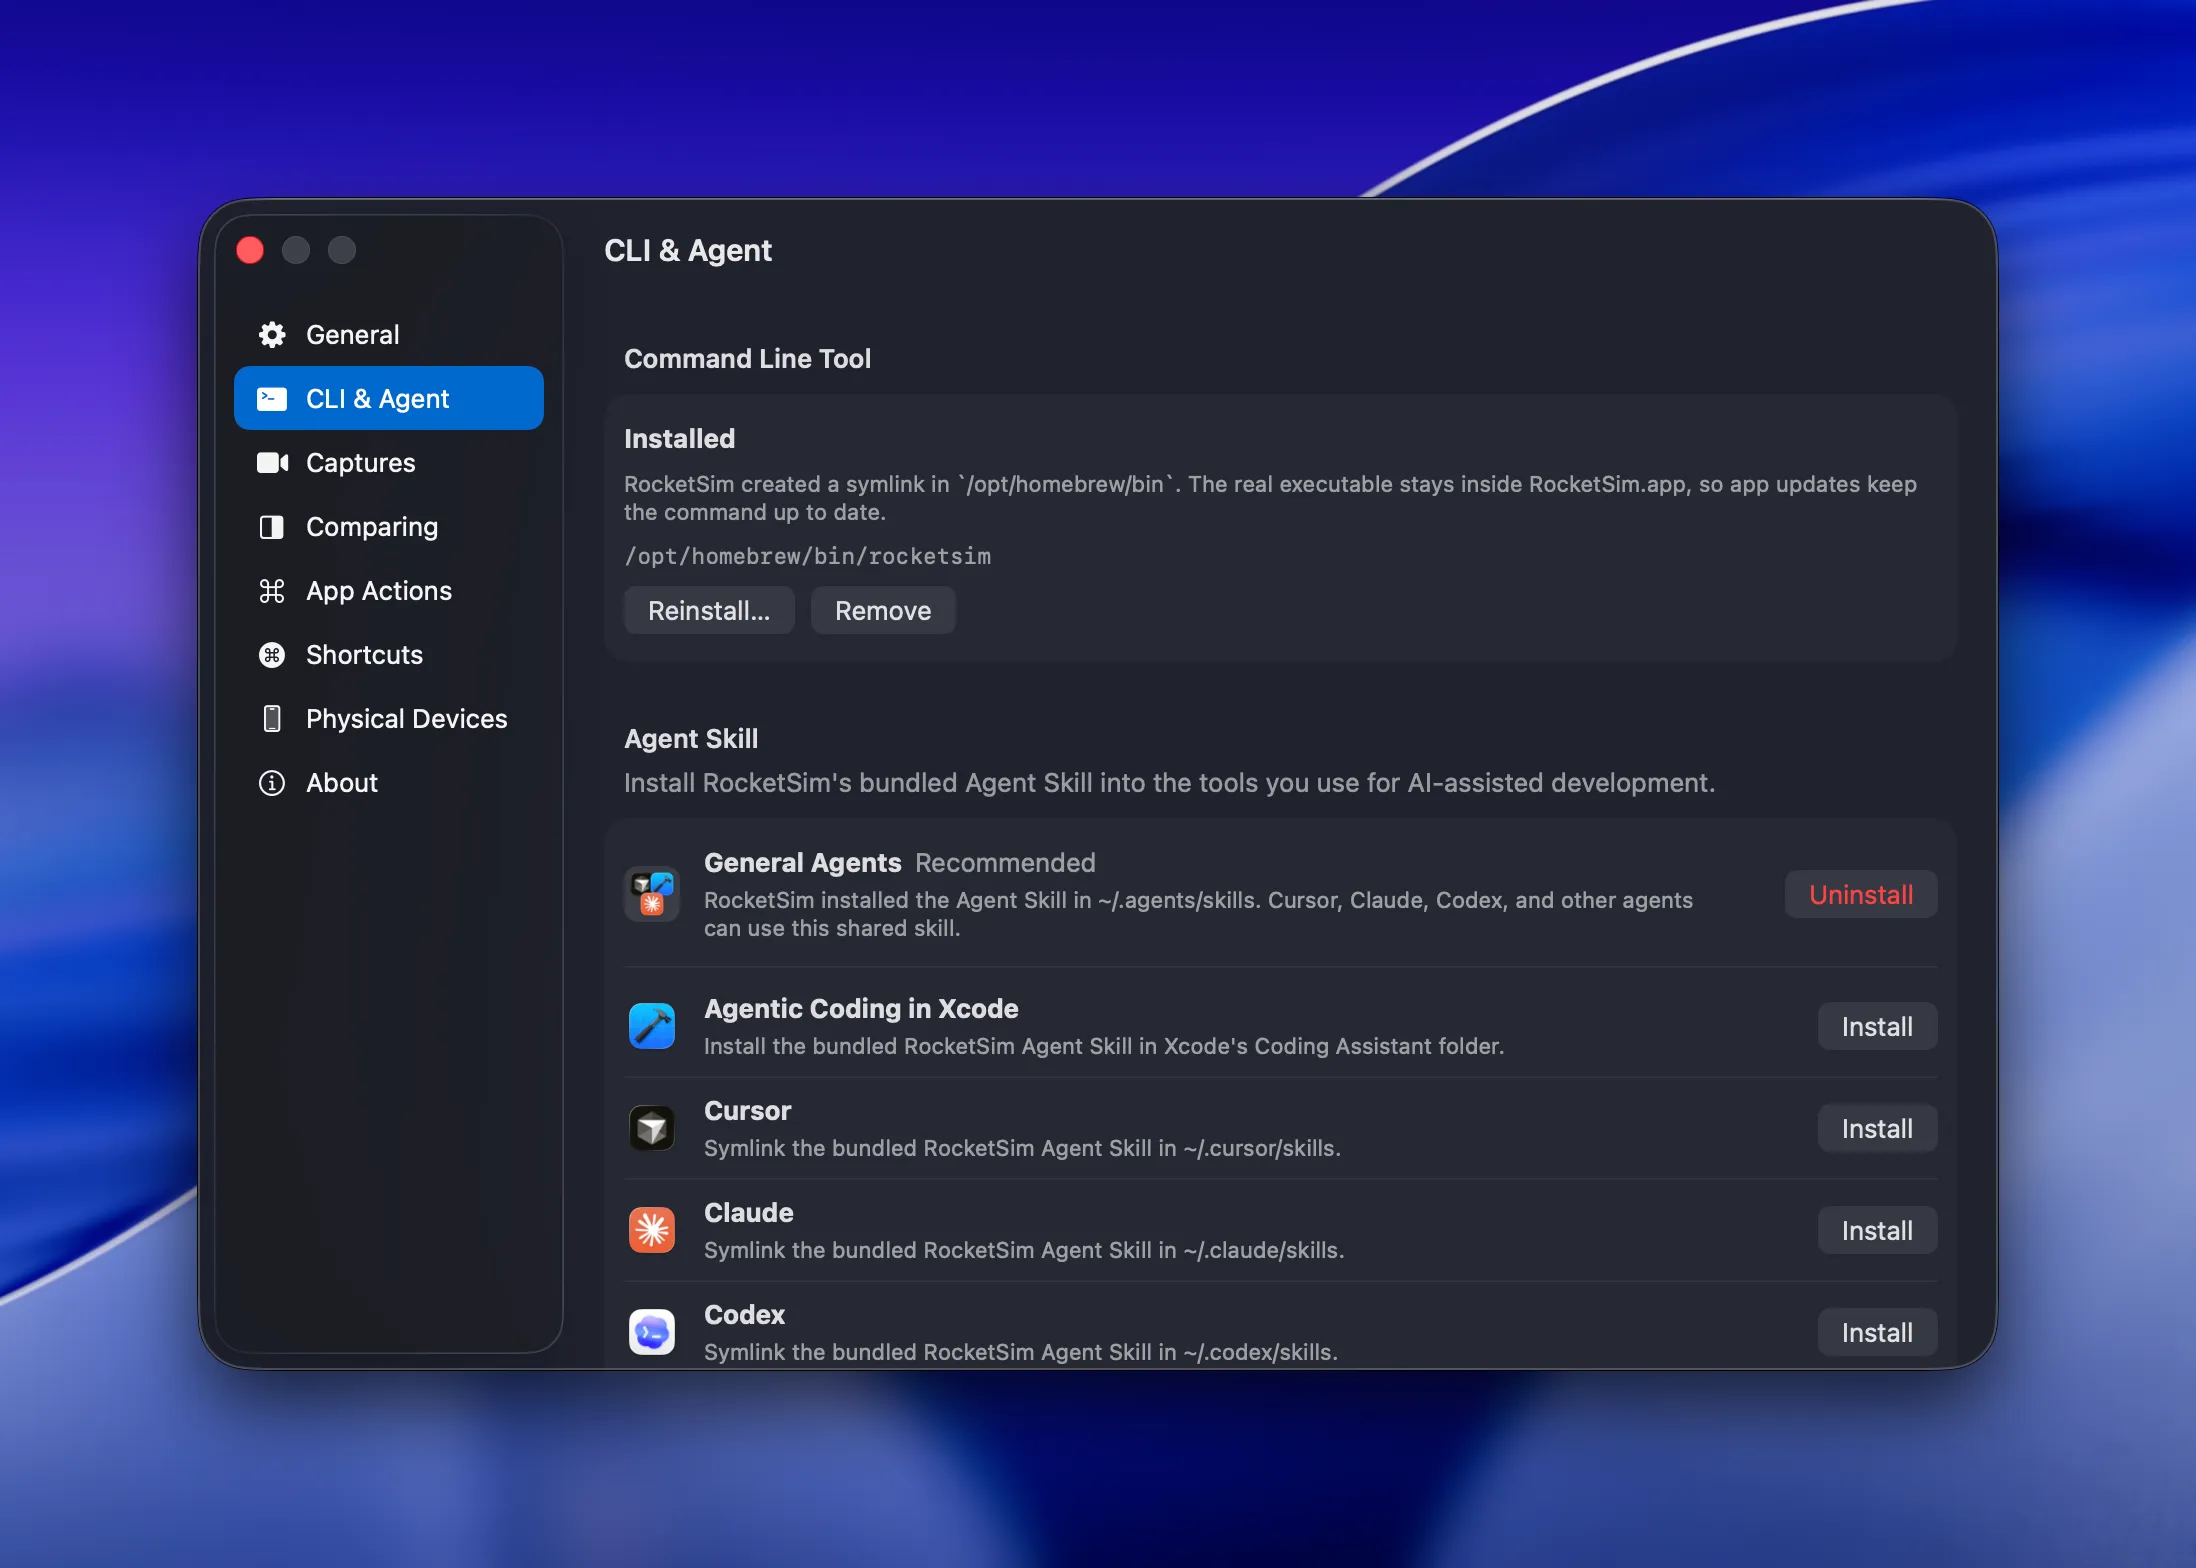
Install it from RocketSim → Settings → CLI & Agent.
Why the skill is recommended
Section titled “Why the skill is recommended”You can run the CLI yourself, but agents perform best when they have clear, tool-specific instructions. The RocketSim Agent Skill provides those instructions without requiring you to copy prompts into every project.
Use the skill when you want Cursor, Claude, Codex, Xcode, or another coding agent to inspect a running Simulator app and perform real UI steps. The skill keeps the agent focused on RocketSim’s safest interaction loop instead of inventing shell commands or guessing coordinates from screenshots.
The skill helps agents:
- Use RocketSim’s compact
--agentoutput before deciding what to do - Prefer semantic interactions over fragile coordinate taps when possible
- Work with RocketSim’s
rs/1agent protocol without needing to know its internals - Recover when a screen changes between inspection and interaction
- Use screenshots when accessibility data is sparse or incomplete
- Run
rocketsim doctorwhen setup needs to be checked
Compared with other tools for controlling the iOS Simulator, RocketSim used 99% fewer tokens, took up 95% less of your agent’s context (leaving more room for your actual code), and ran 24% faster. Estimated from our July 2026 head-to-head benchmark. Read how we test the CLI and Agent Skill for the methodology and improvement findings.
Install from RocketSim
Section titled “Install from RocketSim”- Open RocketSim → Settings → CLI & Agent
- Install the Command Line Tool if
rocketsimis not on yourPATHyet - In Agent Skill, choose General Agents for broad support or Agentic Coding in Xcode for Xcode’s built-in coding assistant
- Click Install or Repair
- Restart or refresh your AI coding tool if it does not discover new skills automatically
RocketSim installs the skill as a symlink to the bundled skill inside RocketSim.app. When RocketSim updates, the skill keeps pointing at the latest installed app version.
If the agent reports that rocketsim is not on its PATH, it should also check /opt/homebrew/bin, /usr/local/bin, ~/.local/bin, and the helper inside /Applications/RocketSim.app. Agent shells can use a different PATH than Terminal. Reinstall the command from RocketSim only when none of those locations contains it.
Supported destinations
Section titled “Supported destinations”We recommend General Agents for most setups. It installs the skill into the shared .agents/skills location, so multiple AI coding tools can use the same version-matched RocketSim skill instead of each tool needing its own copy.
Choose Agentic Coding in Xcode when you use Xcode’s built-in Claude Agent or Codex integration. Xcode keeps its coding assistant configuration in ~/Library/Developer/Xcode/CodingAssistant, separate from Claude Code’s ~/.claude/skills folder. Restart Xcode after installing or repairing this destination.
Use a tool-specific destination like Cursor, Claude, or Codex if that tool only scans its own skill folder. You can also choose a custom skill folder if your tool stores skills somewhere else.
If RocketSim shows Repair, the existing symlink points somewhere unexpected or the app has moved. Repairing updates the symlink to the current RocketSim app.
Why it stays up to date
Section titled “Why it stays up to date”RocketSim ships the CLI and Agent Skill inside the app bundle. The installed files are symlinks, not copied snapshots. That matters because the CLI surface and skill instructions evolve together.
After an App Store update, your rocketsim command and installed skill still resolve to the current app bundle. Agents get the guidance that matches the RocketSim version they are controlling.
For you as a developer, this means you only have to keep RocketSim updated to the latest App Store version. Your agents will automatically use the latest guidance and the best available way to interact with the Simulator.
The skill-guided interaction loop
Section titled “The skill-guided interaction loop”The current skill teaches agents to start with a compact nav or act screen read, prefer labels over coordinates, guard interactions with --screen latest, and combine known sequential actions with rocketsim do. It uses interaction deltas and concrete waits to avoid unnecessary screen reads. Debug snapshots and screenshots are fallbacks when normal accessibility output is insufficient.
Simulator-targeting commands also ensure a live, interactive browser preview is available. RocketSim includes its URL in the command’s context.preview_url, and the skill tells the agent to open that URL in a user-visible IDE browser and share it at the start and end of the task. This lets you follow the agent’s work and click through the final Simulator state without switching away from your coding tool.
For accessibility work, the skill points agents to a dedicated reference for fixing audit findings without changing your layout. The agent saves the element frames before the fix, rebuilds, and compares them afterwards so only the intended elements change. It then runs rocketsim accessibility-audit again to confirm the findings are gone.
The agent should run rocketsim doctor only when setup appears broken: the CLI cannot connect, no Simulator can be found, or perception and interactions fail unexpectedly. Routine navigation should start with rocketsim screen or rocketsim elements --agent.
What the agent can do after setup
Section titled “What the agent can do after setup”Once the skill is installed and RocketSim is running, your agent can:
- Read visible accessibility elements, including navigation and tab bar items
- Tap, long-press, swipe, and type using labels or coordinates
- Press simulator hardware buttons like Home, Lock, or Siri
- Navigate multi-step app flows with fewer retries
- Use compact screen summaries to spend fewer tokens per screen read
- Follow the live Simulator and review its final state in an IDE browser
- Capture a screenshot when visual context is needed
- Start a live Browser Preview for hands-on review and agent-ready visual feedback
- Audit the visible screen for accessibility problems, fix them, and validate the result with
rocketsim accessibility-audit(see Accessibility Audit) - Capture and control iPhone Duo Simulators, including the hinge pose
How to verify it works
Section titled “How to verify it works”First, check your setup:
rocketsim doctorThen open your AI coding tool and try:
Use RocketSim to navigate through
<your_app_name>in the Simulator
If the skill is installed, RocketSim is running, and your app is already open in the Simulator, the agent should detect RocketSim, read the visible UI, and start interacting with the app based on what is on screen. It should also share a Live preview: URL and open it in the IDE browser when the coding tool provides one.
The same command discovers booted Simulators shown through Xcode 27’s Device Hub. RocketSim selects the only booted Simulator automatically; if several are available, focus one or pass its UDID using --udid <udid>. For network-condition tests, the agent may need you to approve RocketSim’s Network Extension once; macOS does not allow an agent to complete that approval headlessly.
Learn more
Section titled “Learn more”- RocketSim CLI — the commands agents use to inspect and interact with the Simulator
- Browser Preview — live interaction and visual feedback from your browser
- Agentic Development with RocketSim — scenarios, example prompts, and why RocketSim is effective for agent-driven Simulator automation
- CLI & Agent settings — installing and repairing the CLI and skill
- How we test AI agents for the iOS Simulator — repeatable scenarios, benchmark methodology, and results