Creating Recordings
Record high-quality GIF and MP4 videos from the iOS Simulator with touch indicators, device bezels, audio narration, and custom backgrounds.
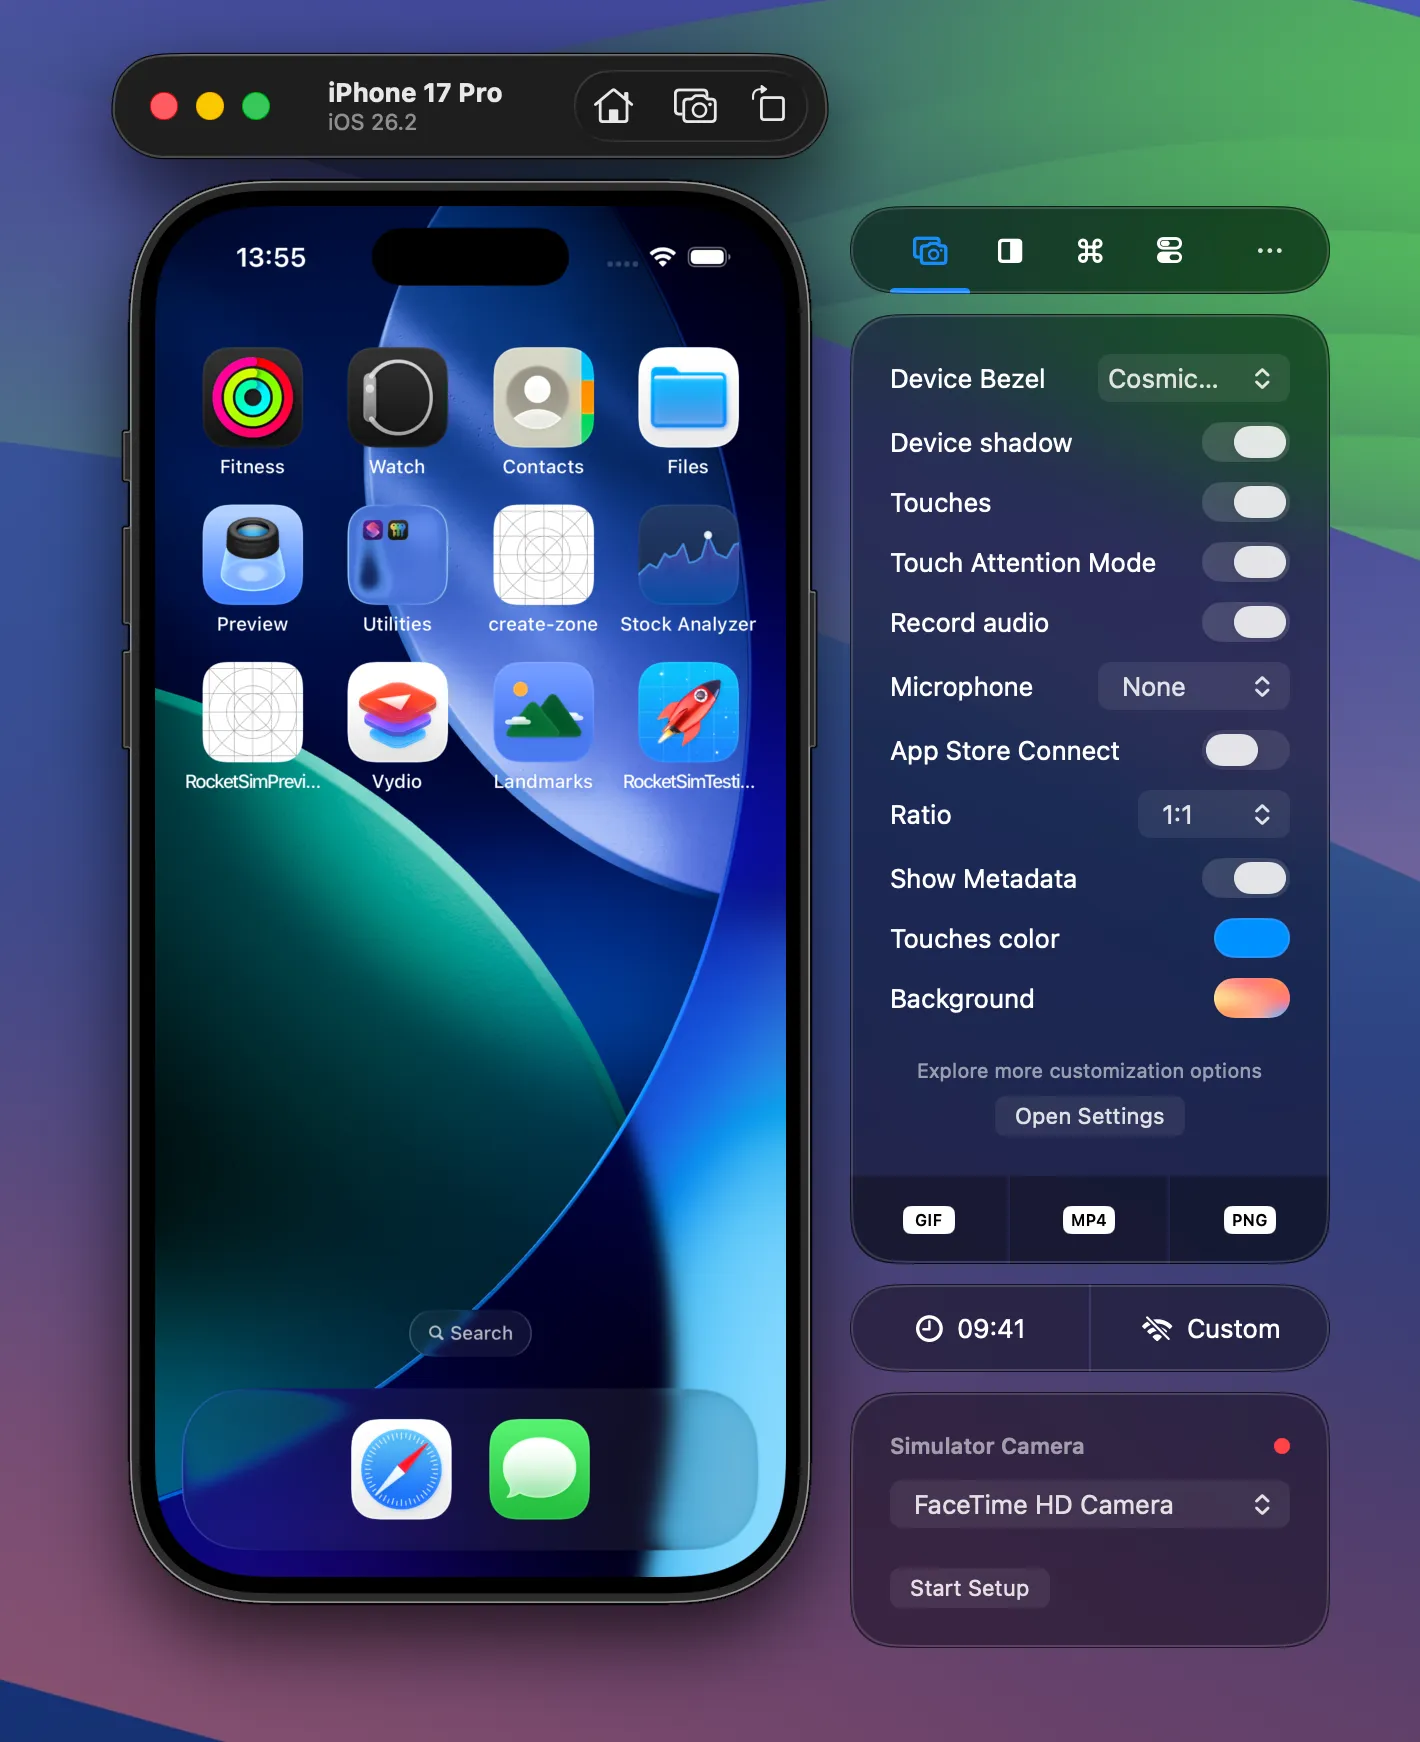
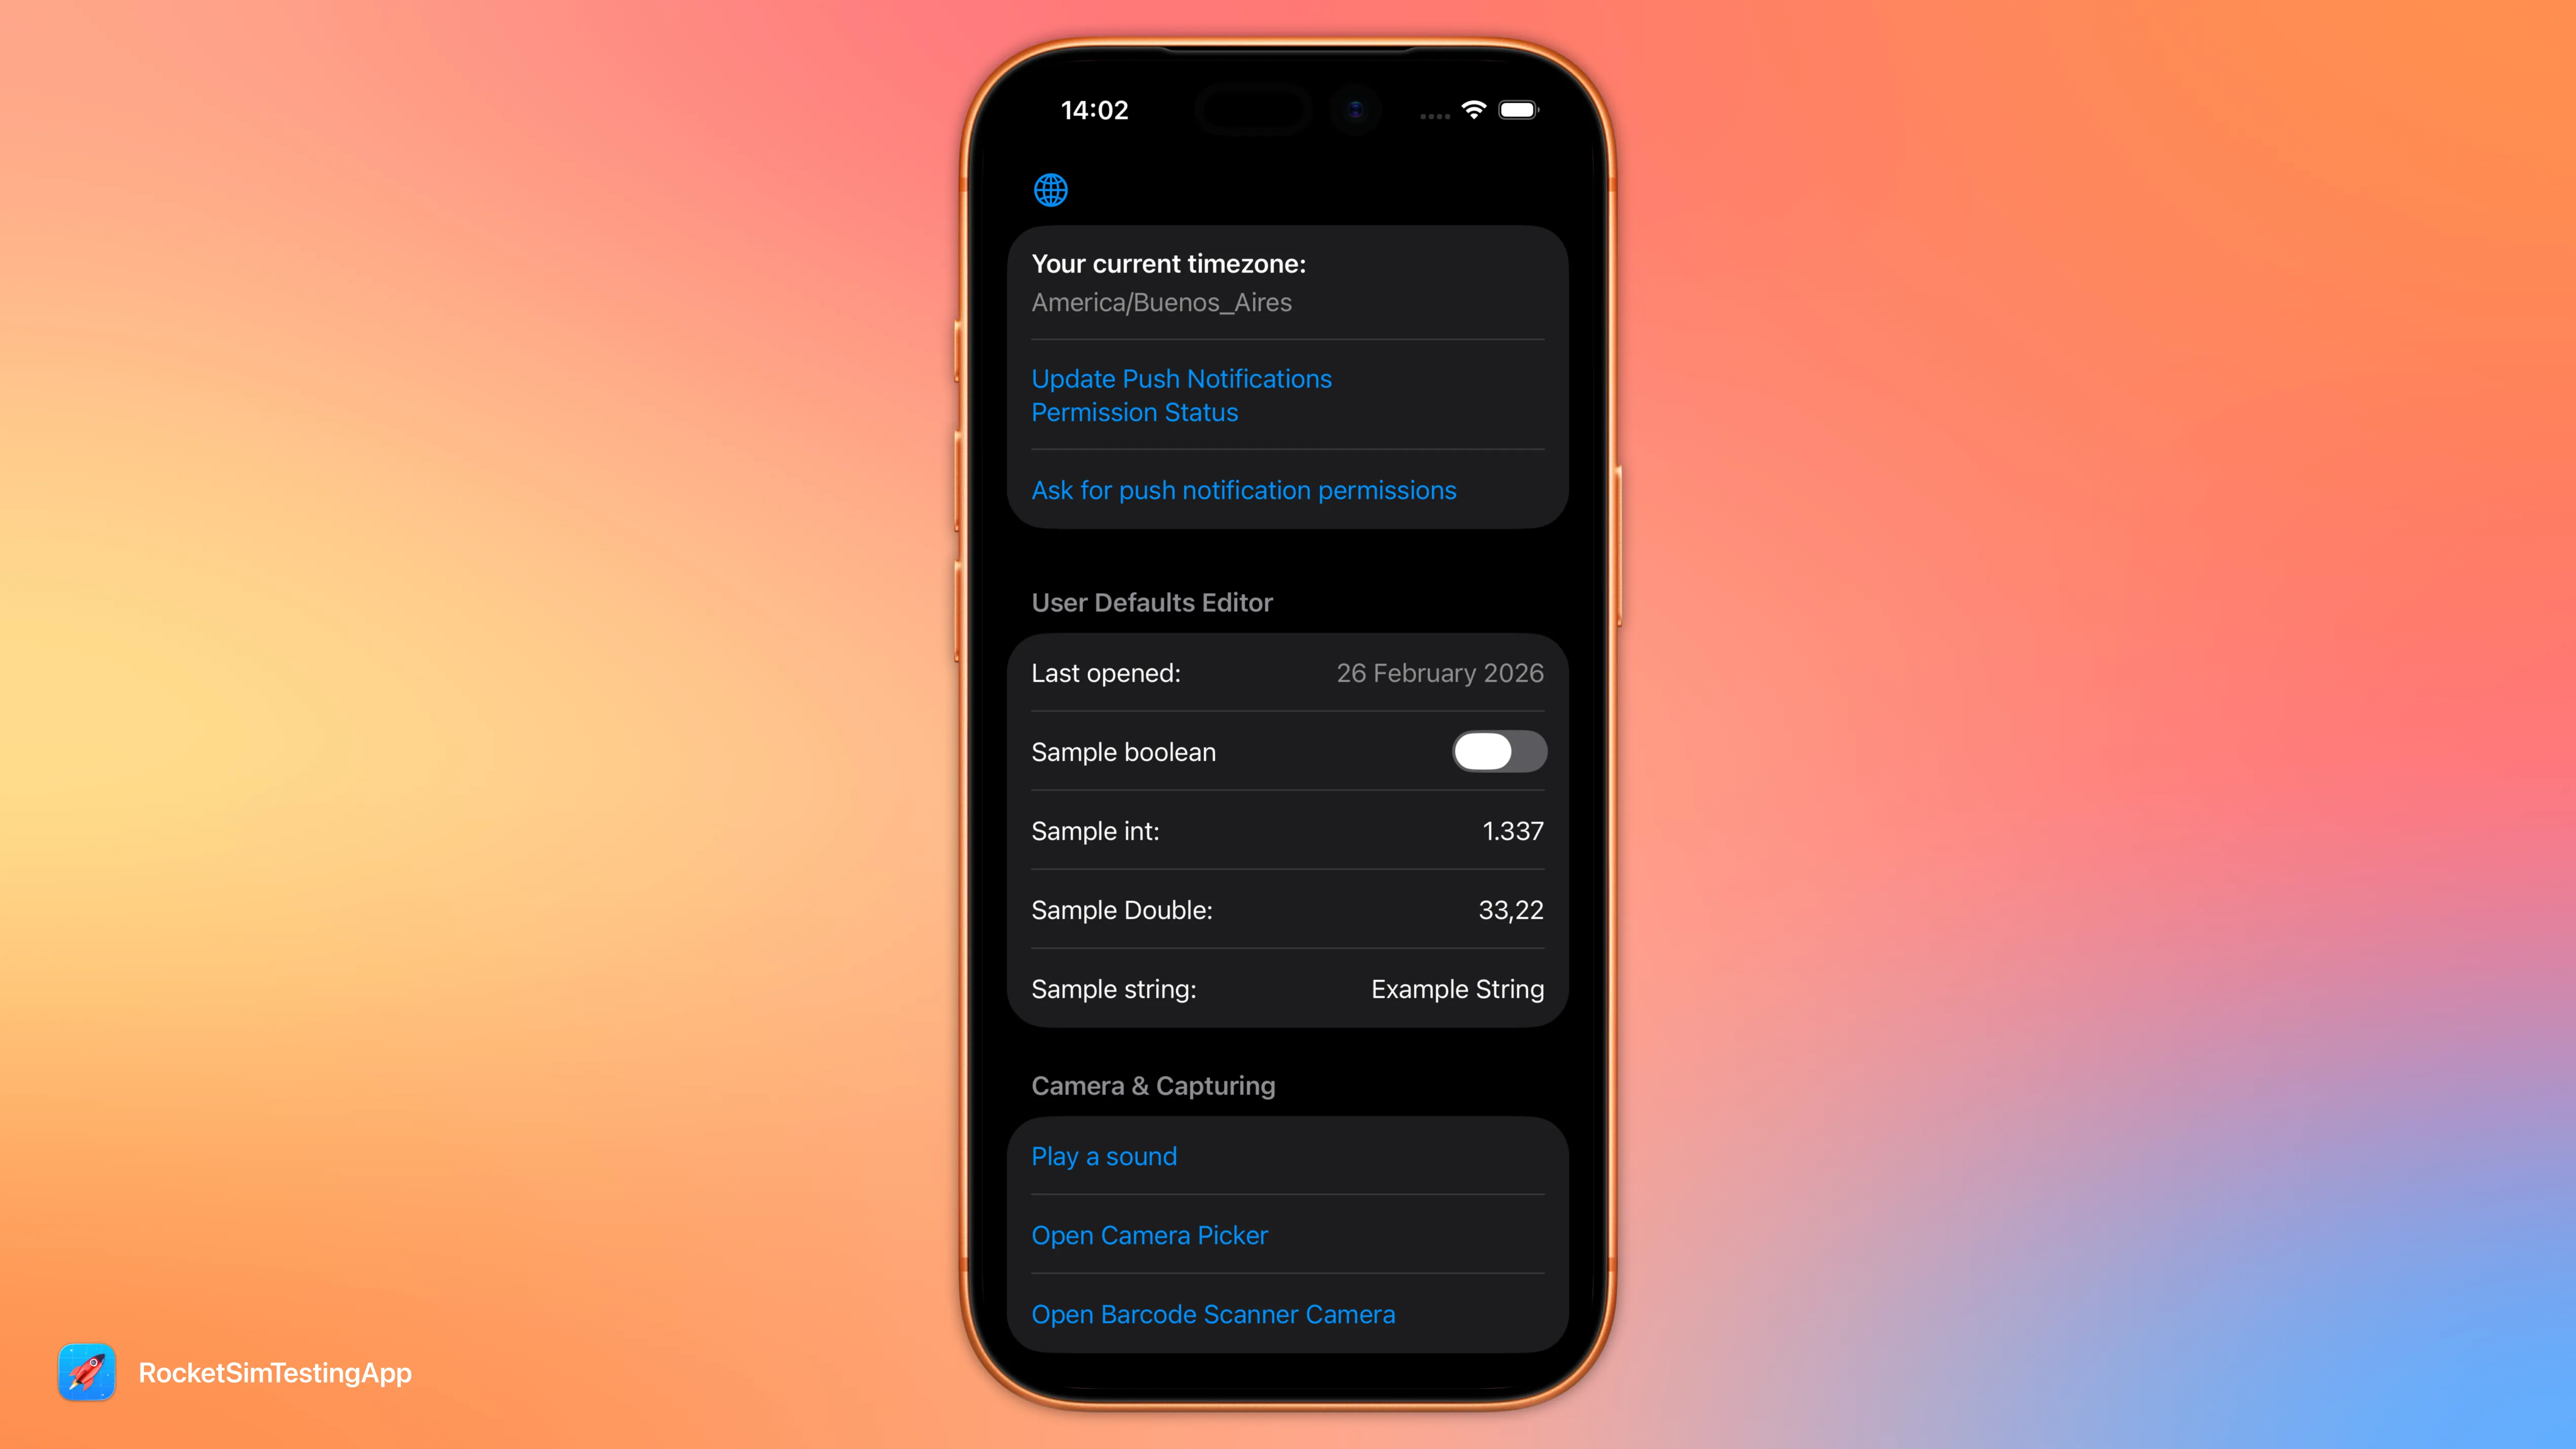
RocketSim lets you create GIF and MP4 recordings of the Xcode Simulator from the Captures tab in the side window. You can record with touches, audio, device bezels, and transparent or custom backgrounds. If you need recordings optimized for App Store Connect, see App Store Connect Optimization.
Creating a recording
Section titled “Creating a recording”- Open the Simulator
- Select the Captures tab inside the RocketSim Side Window
- Click GIF Record or MP4 Record and perform your interactions
- Press Stop when you’re done
- A floating thumbnail appears in the bottom right corner — drag or copy your recording from there
Most capture options (bezels, touches, audio, ratio, background) can be set before you start, either in the Captures tab or in Settings → Captures.
Capture options
Section titled “Capture options”Configure how your recordings look and what they include. All of the following are available in the Captures tab of the side window; many are also in Settings → Captures.
Device bezels
Section titled “Device bezels”You can add a device frame around the Simulator content. Choose None, Simulator Bezel (the standard Simulator chrome), or a real device bezel (device-specific frames for supported iPhone and iPad models). Use the Device Bezel picker in the Captures tab. Your choice is stored per device, so each Simulator type can have its own preference.
Touches and touch attention
Section titled “Touches and touch attention”- Show touches in recordings — Renders touch indicators so viewers can see taps and gestures. You can also enable Show stroke around touches in Settings → Captures.
- Touch Attention Mode — Keeps a single touch indicator on screen that follows your mouse pointer the whole time, useful for directing attention in demos.
- Touches color — Pick a custom color for the touch indicators in the Captures tab or in Settings → Captures (plain colors only).
See also Touch indicators for more on how touches appear in captures.
Device shadow
Section titled “Device shadow”When you use device bezels, you can turn on Device shadow to add a shadow behind the device frame. The toggle is in the Captures tab and in Settings → Captures under Bezels.
- Simulator audio — Records only the audio that comes out of the Simulator (your app’s sound). It does not record system audio or other apps. Enable it with Record audio in the Captures tab or Record Simulator audio during recordings in Settings → Captures. No custom drivers are required.
- Microphone — Optionally record from any system microphone (e.g. for voiceover). In the Captures tab, use the Microphone picker and choose None or a device. You can use Simulator audio and a microphone at the same time.
Output ratio
Section titled “Output ratio”You can lock the output to a specific aspect ratio. Supported values: Auto (no fixed ratio), 1:1, 5:4, 4:3, 3:2, and 16:9. Set it with the Ratio picker in the Captures tab.
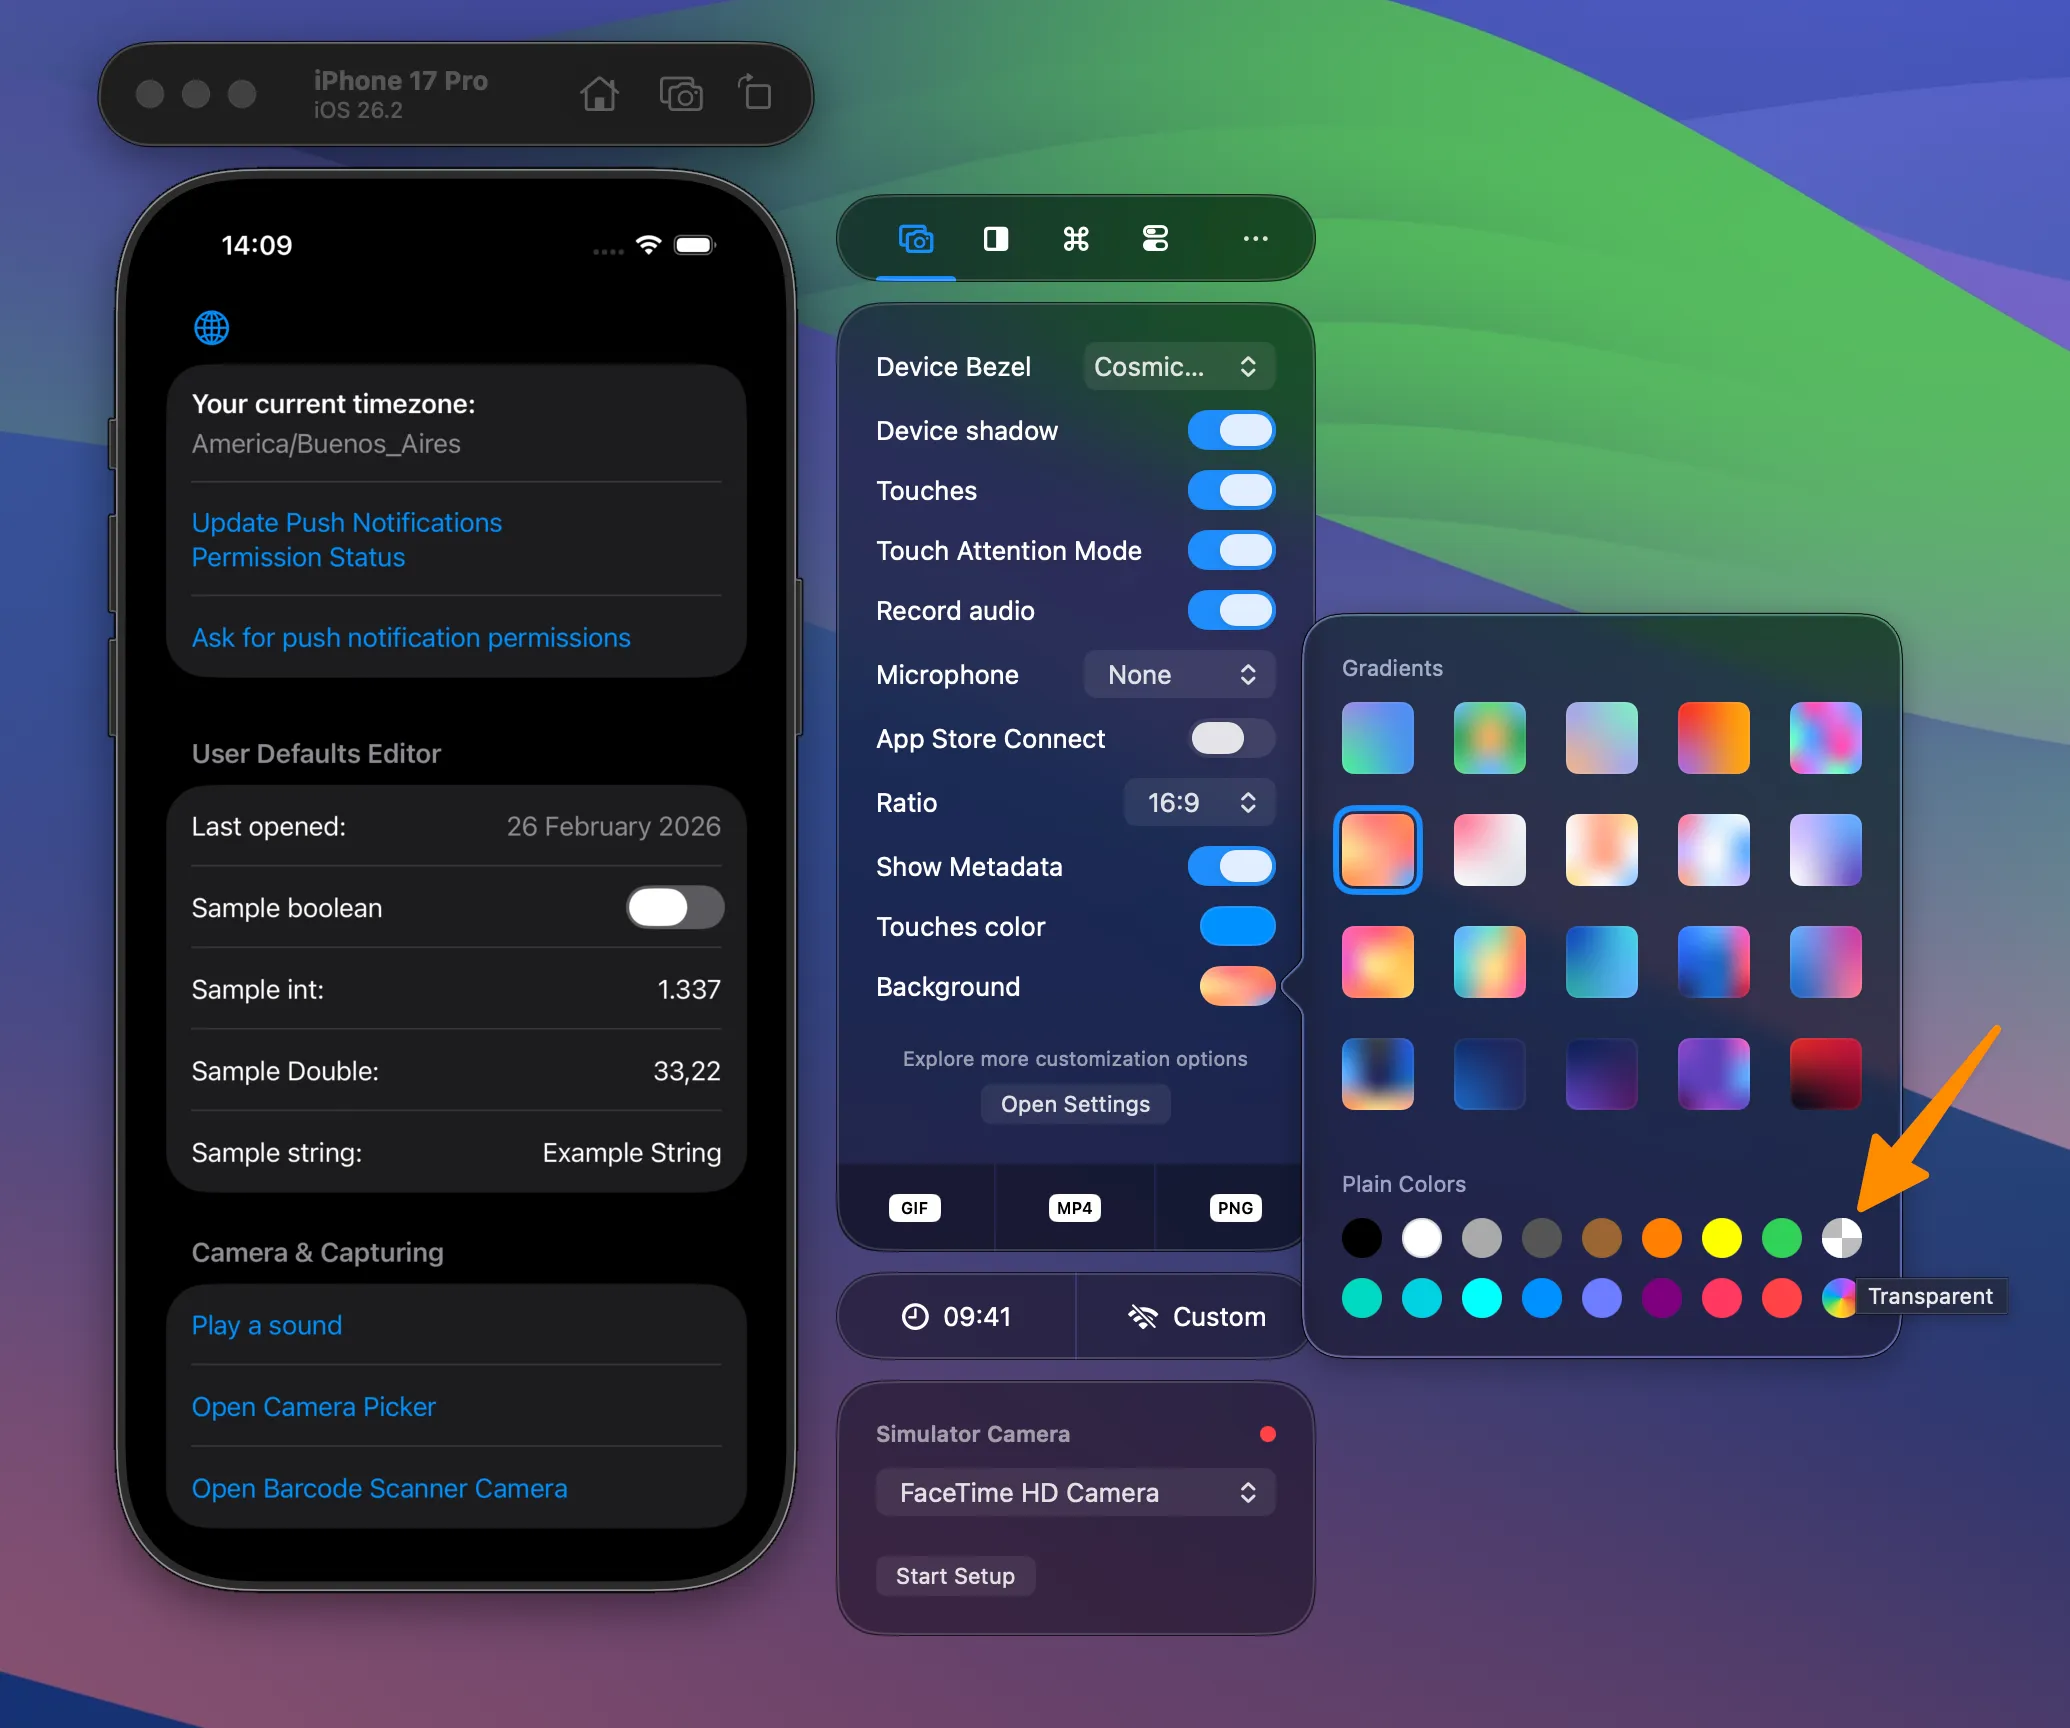
Background and frame
Section titled “Background and frame”- Background — Choose what appears behind the device: plain colors, gradient (mesh) backgrounds, or transparent. Use the Background control in the Captures tab or Captures background in Settings → Captures. Transparent is the default.
- Device Frame color — When using bezels, you can set the frame color separately (plain colors) in Settings → Captures under Bezels.
Audio recording
Section titled “Audio recording”Enable Record audio (Simulator audio) or pick a Microphone (or both) in the Captures tab or in Settings → Captures. RocketSim does not install custom audio drivers; it works with the system as-is. For details on what each option records, see Capture options > Audio above.
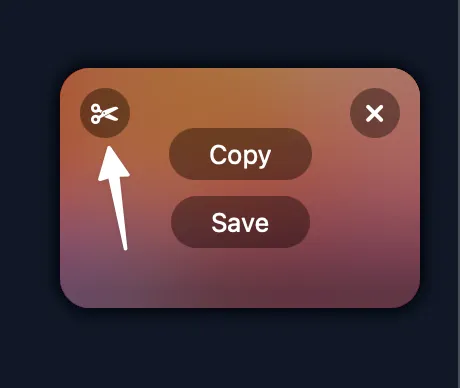
Trimming a recording
Section titled “Trimming a recording”Once your recording is done, tap the scissors button on the floating thumbnail to open the trim editor. Adjust your video and click Trim when you’re done.
Transparent recordings
Section titled “Transparent recordings”You can create recordings with a transparent background. Set the background to transparent in the Background picker (see Capture options > Background and frame) in the Captures tab or in Settings → Captures:
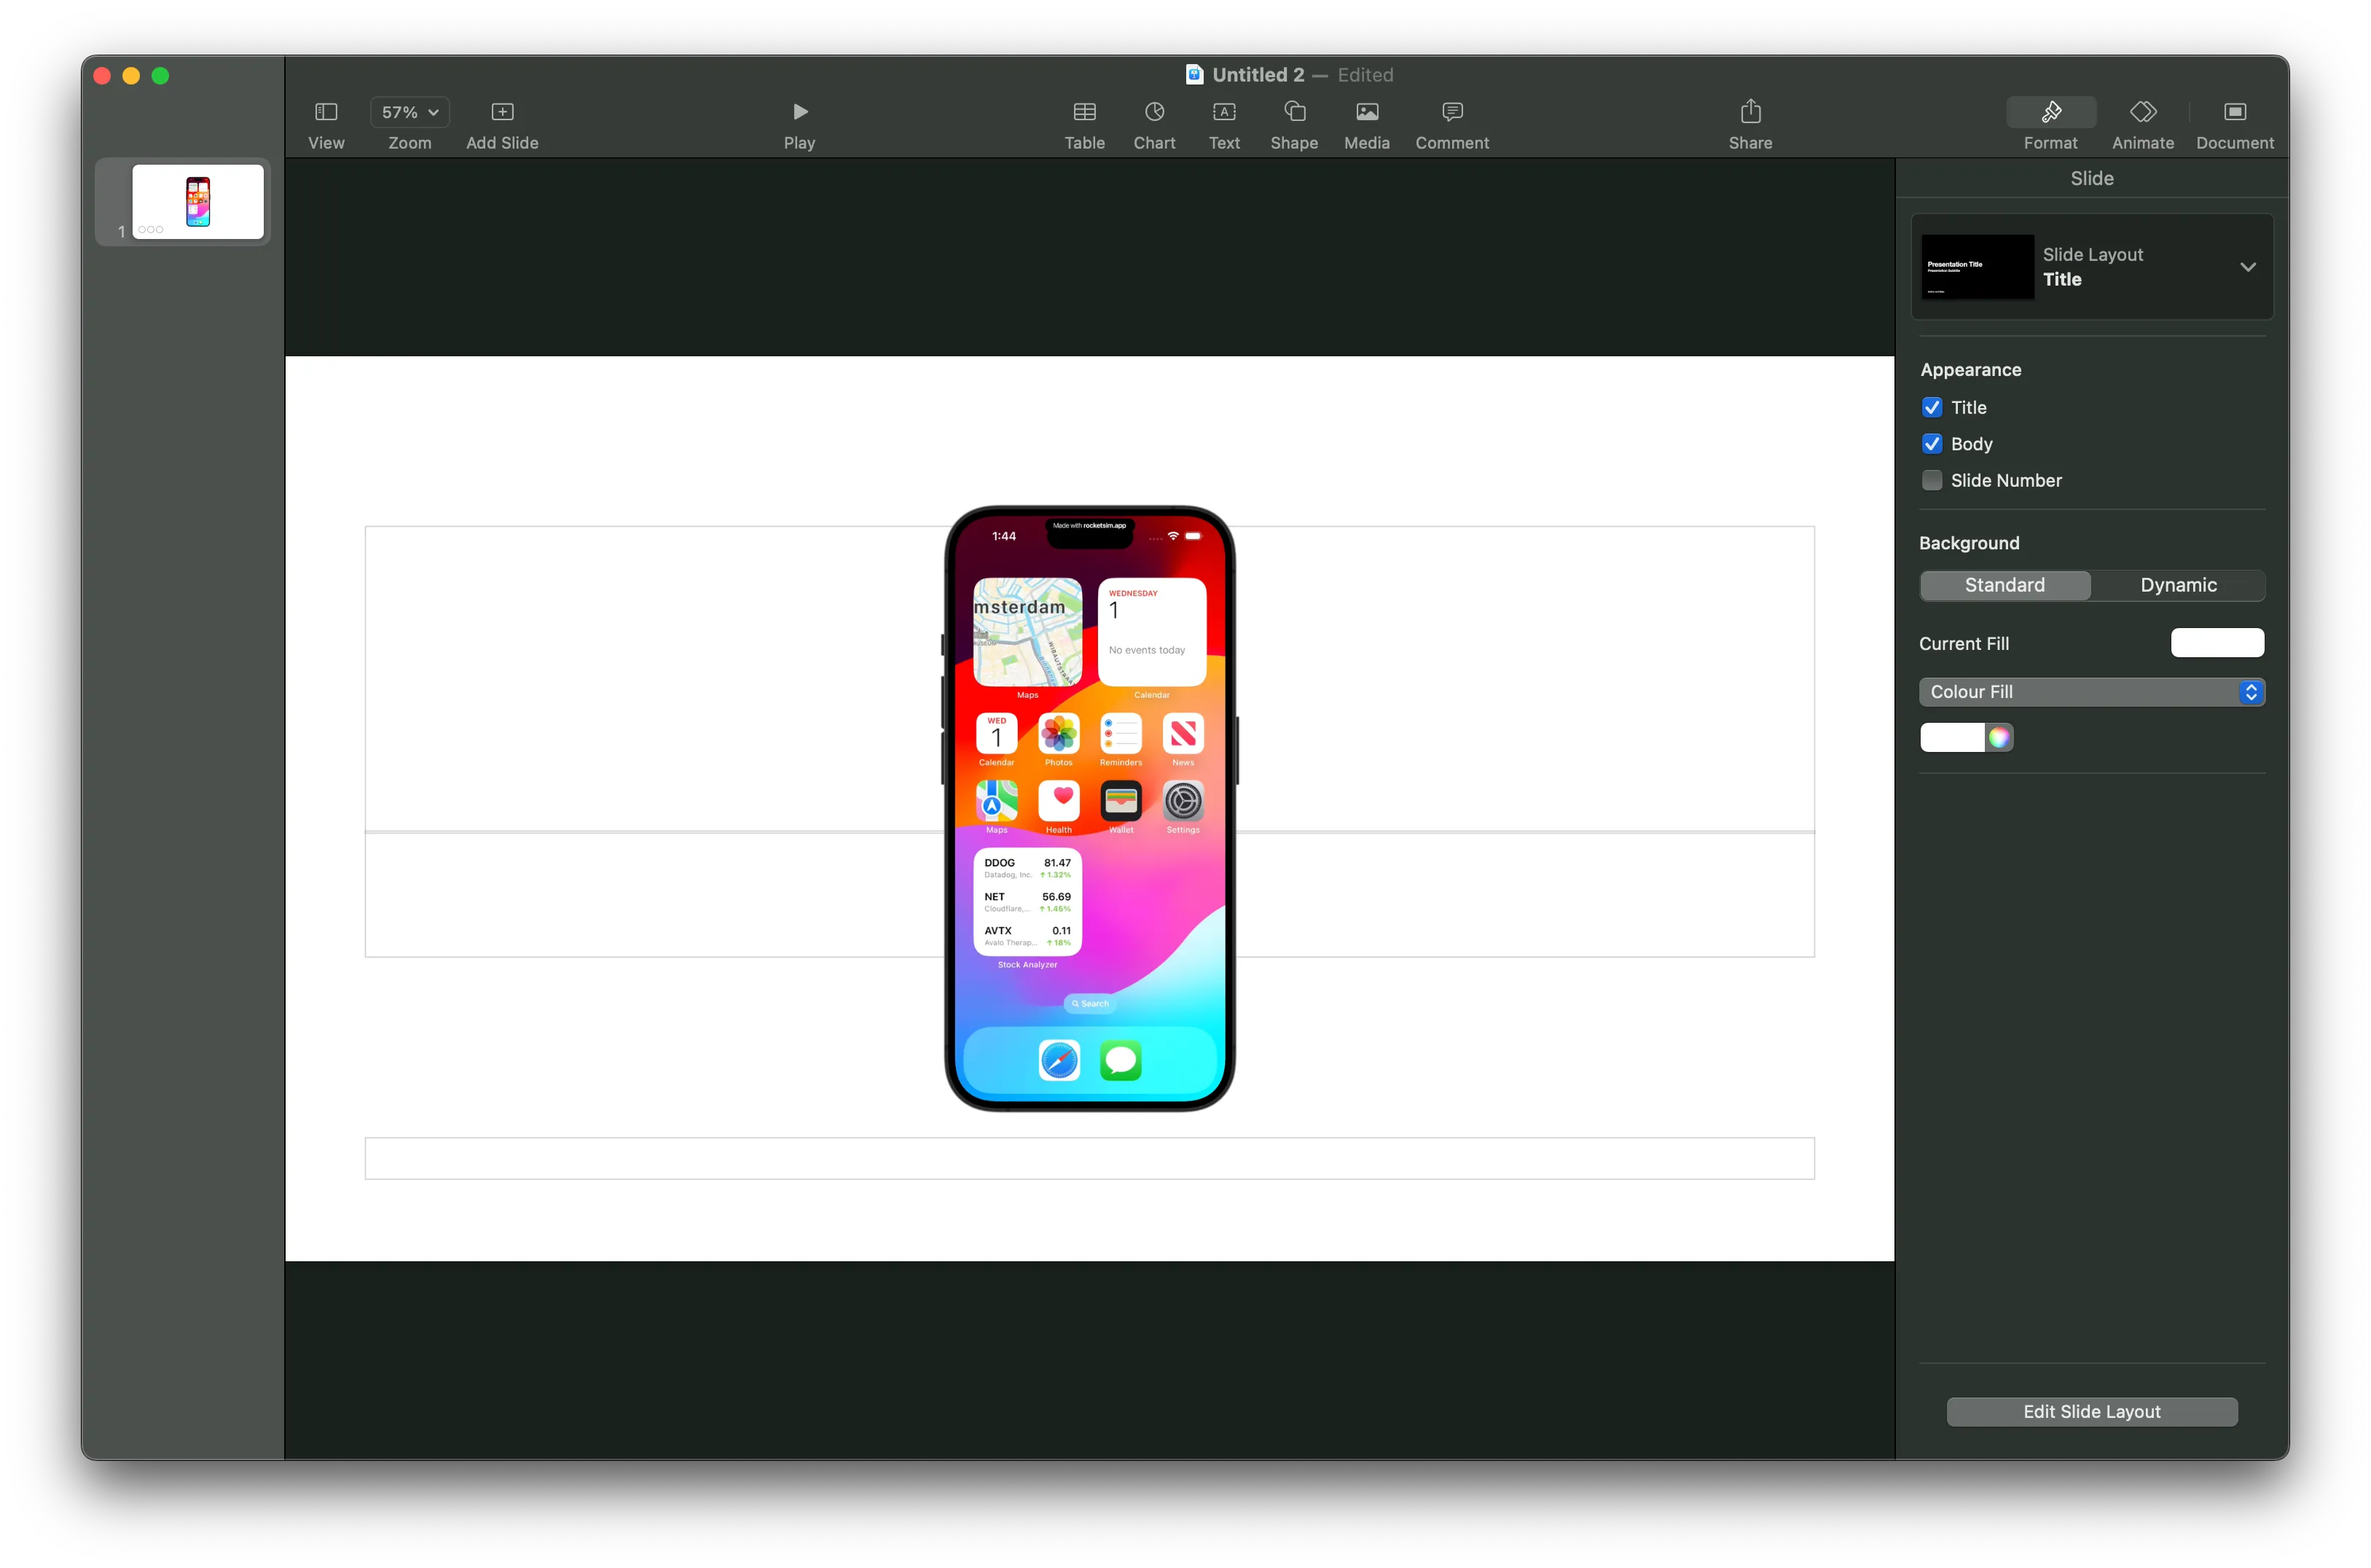
App Store Connect videos cannot have alpha layers, so disable App Preview Optimized mode if you need transparency. Apps like QuickTime may not show transparency correctly — copy your video into Keynote to verify:
Capture Metadata
Section titled “Capture Metadata”Recordings can show the app icon, app title, and an optional subtitle on the background. That helps viewers see which app they’re watching in demos and App Store previews.
RocketSim takes this metadata from your most recent build: it reads the app icon and display name from the running Simulator app, so you don’t have to configure anything for the basics.
Using a custom metadata title or subtitle
Section titled “Using a custom metadata title or subtitle”To override the app name or add a custom subtitle (e.g. a version or tagline), configure them in the App Group settings for that app. RocketSim will use those values on the recording background instead of the default app name.
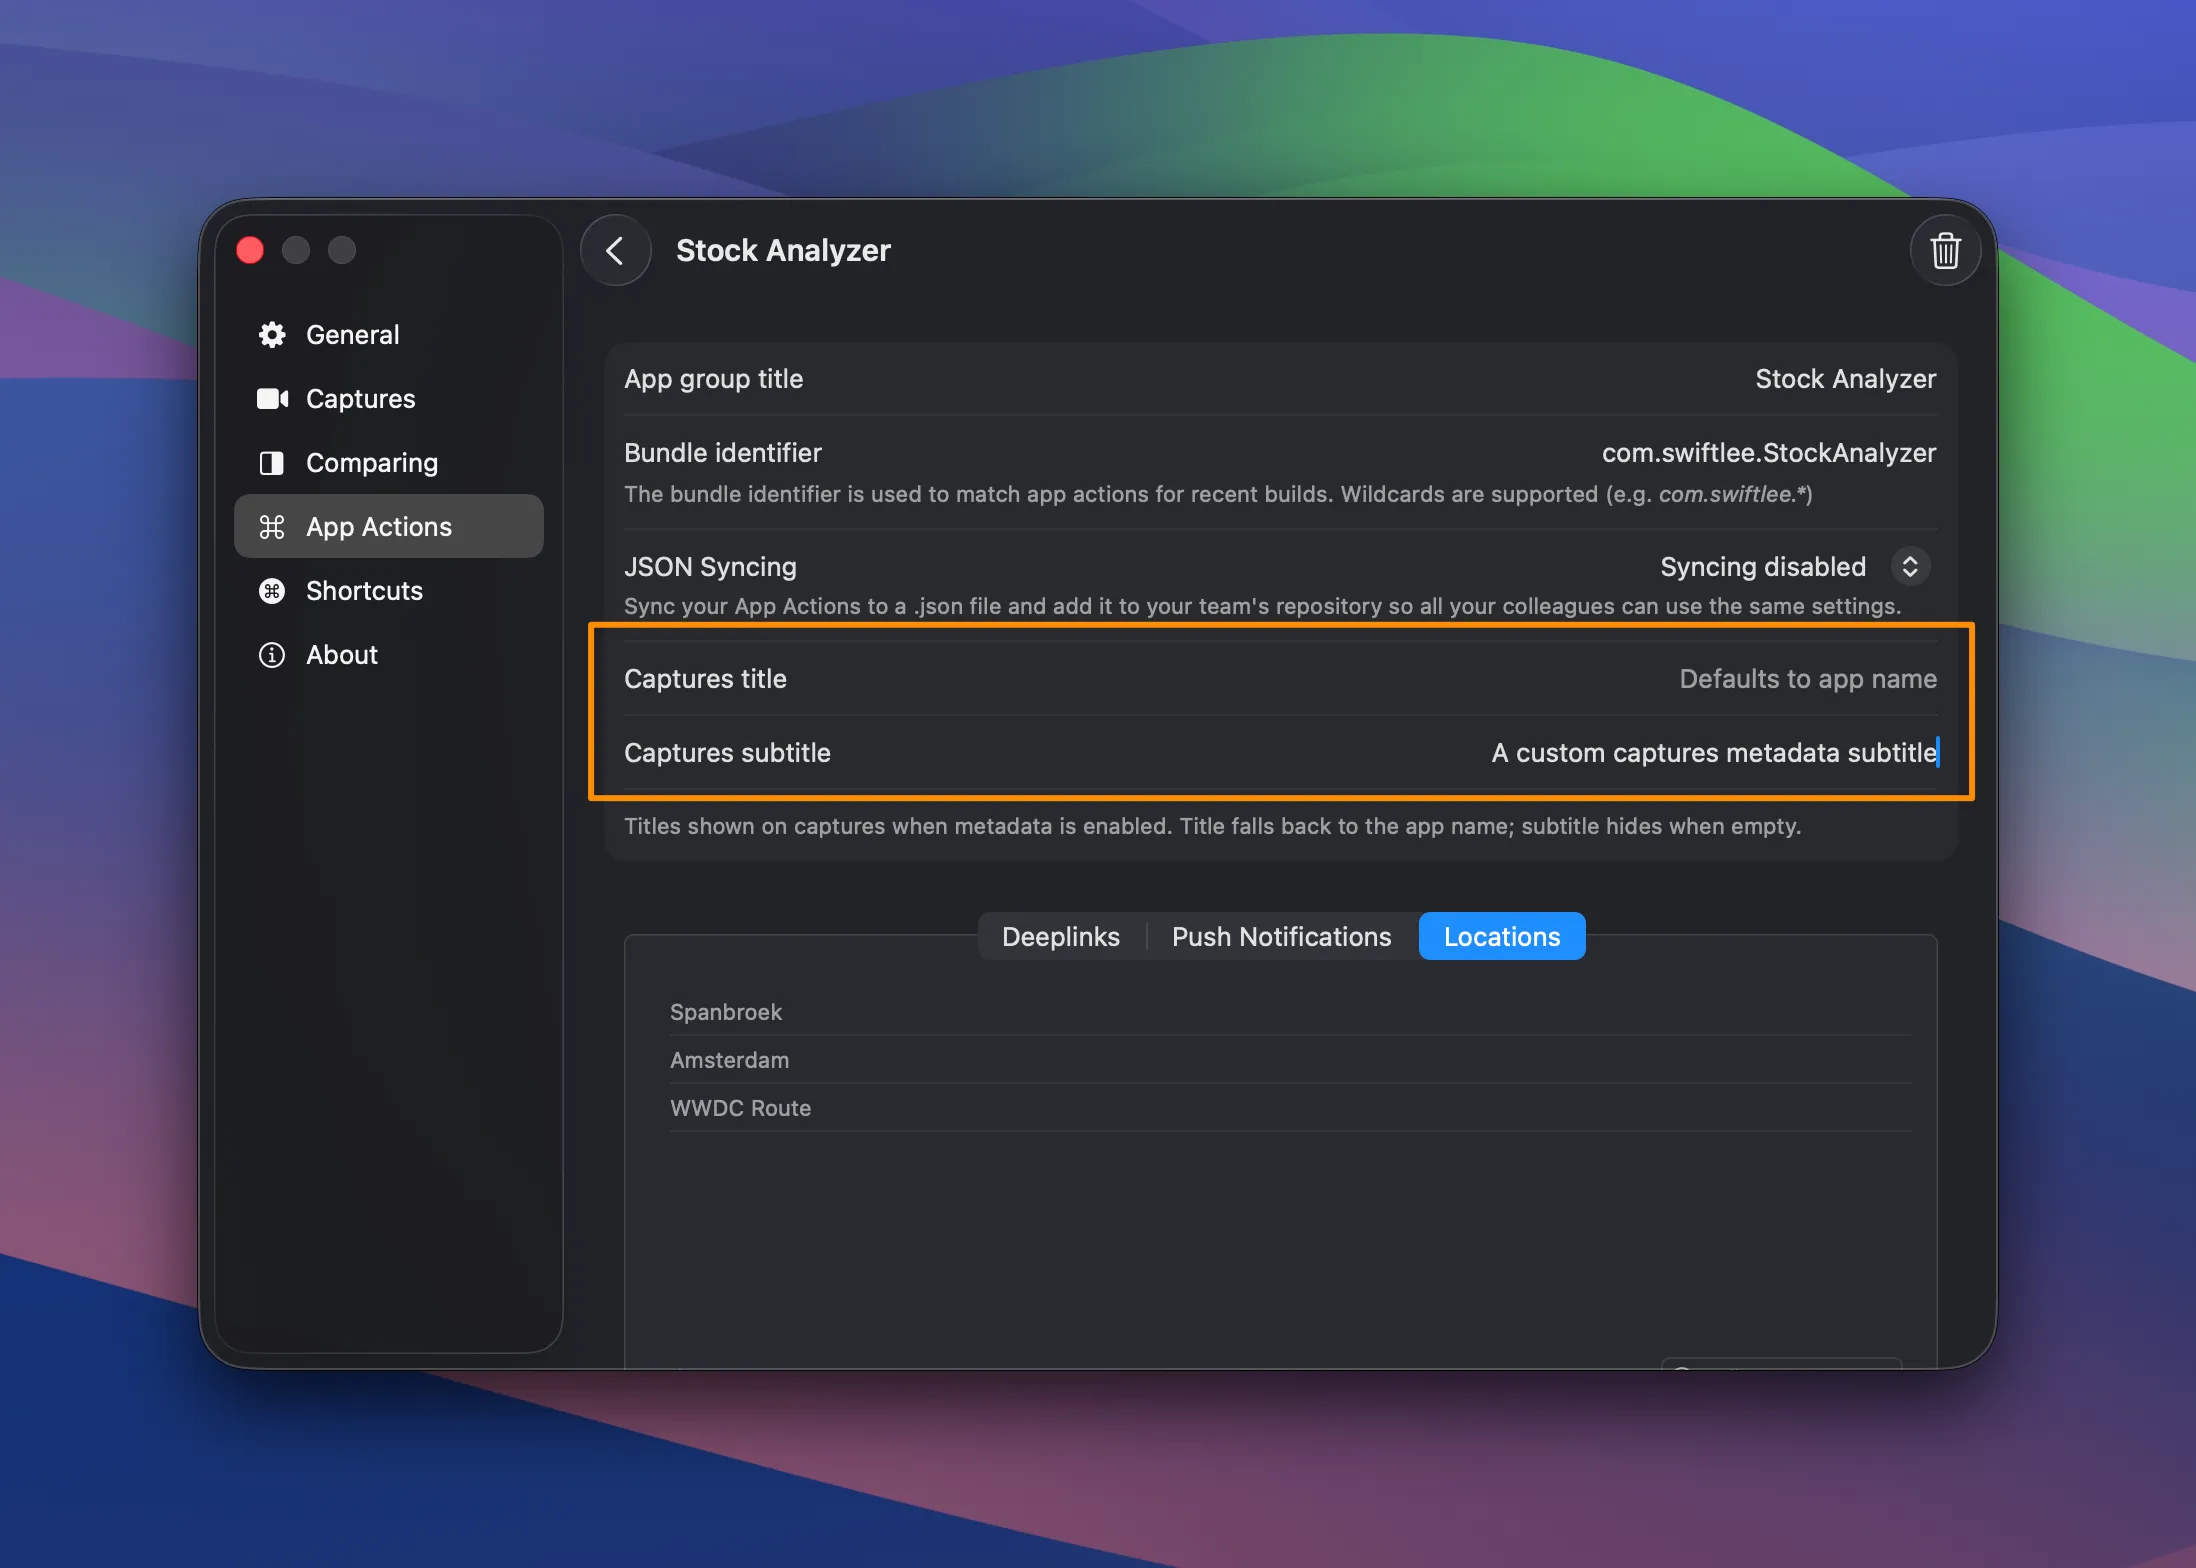
For more on creating and managing App Groups, see Configuring App Actions.
Troubleshooting
Section titled “Troubleshooting”I enabled audio, but it’s not working?
Section titled “I enabled audio, but it’s not working?”Make sure you don’t have any audio routing enabled. Doing so can prevent RocketSim from recording Simulator audio or your microphone correctly.
Does RocketSim install a custom audio driver for audio recording?
Section titled “Does RocketSim install a custom audio driver for audio recording?”No, there’s nothing you need to install for audio recording to work.
Why are my iPad recordings upside-down?
Section titled “Why are my iPad recordings upside-down?”RocketSim cannot detect landscape-left or landscape-right and defaults to one landscape rotation. The fix is simple: rotate your Simulator twice and restart the recording.